Pages

Tuesday, April 29, 2014

Popovers


This blog has moved to a different site.  To get more great recipes and see new post, go to cookingwithbrittany.com


Popovers...I love them; smothered in gravy, split open and cover in melted butter or simply devouring them warm and just out of the oven all on their own.

HOWEVER....
    I can't make them.  I have tried many times to make popovers, but mine just don't pop.  Sure they are tasty, yes they still have lovely flavor.  But when it comes right down to it, my popovers just don't pop.
The last time I tried making them with no success, I put the failure behind me, I vowed never again.

That was six months ago...
     And oh how those popovers haunted me over that time frame.  In my head, on the internet, and even making numerous appearance on the various food shows I watch.  One particular episode of Triple D (Diners, Drive-in & Dives) almost caused me to weep looking at the most amazing and mouth watering popovers I had even seen, that were made at a restaurant in Austin, TX called Foreign & Domestic.   They looked so good, as did everything else that they showed on the episode that I am still trying to figure out when I can get to Denver just so I can go to this place.

But still I resisted the urge to try and make them again, afraid that they would get the better of me one more.  Until the day I brought a bottle of wine over to my parents house, and shared a few glasses of red with my mom and grandma as we sat around the island in her kitchen preparing the menu for our Easter dinner that weekend and my grandmother got the bright idea to suggest we make popovers.
NOOOOOOOOOO!!

     I wanted to scream it, I wanted to shout it, but I just tried suggested other things that we could make.  Not only was I outvoted 2 to 1, it's my grandma and my mom...who was I to argue that.
Because of my on going war with popovers though, we did all decide to meet that Good Friday and attempt making popovers before the big day to see if it could in fact be done.
We didn't use a fancy popover pan, or go too crazy the first go around but we did it.  Did you get that part....WE DID IT!

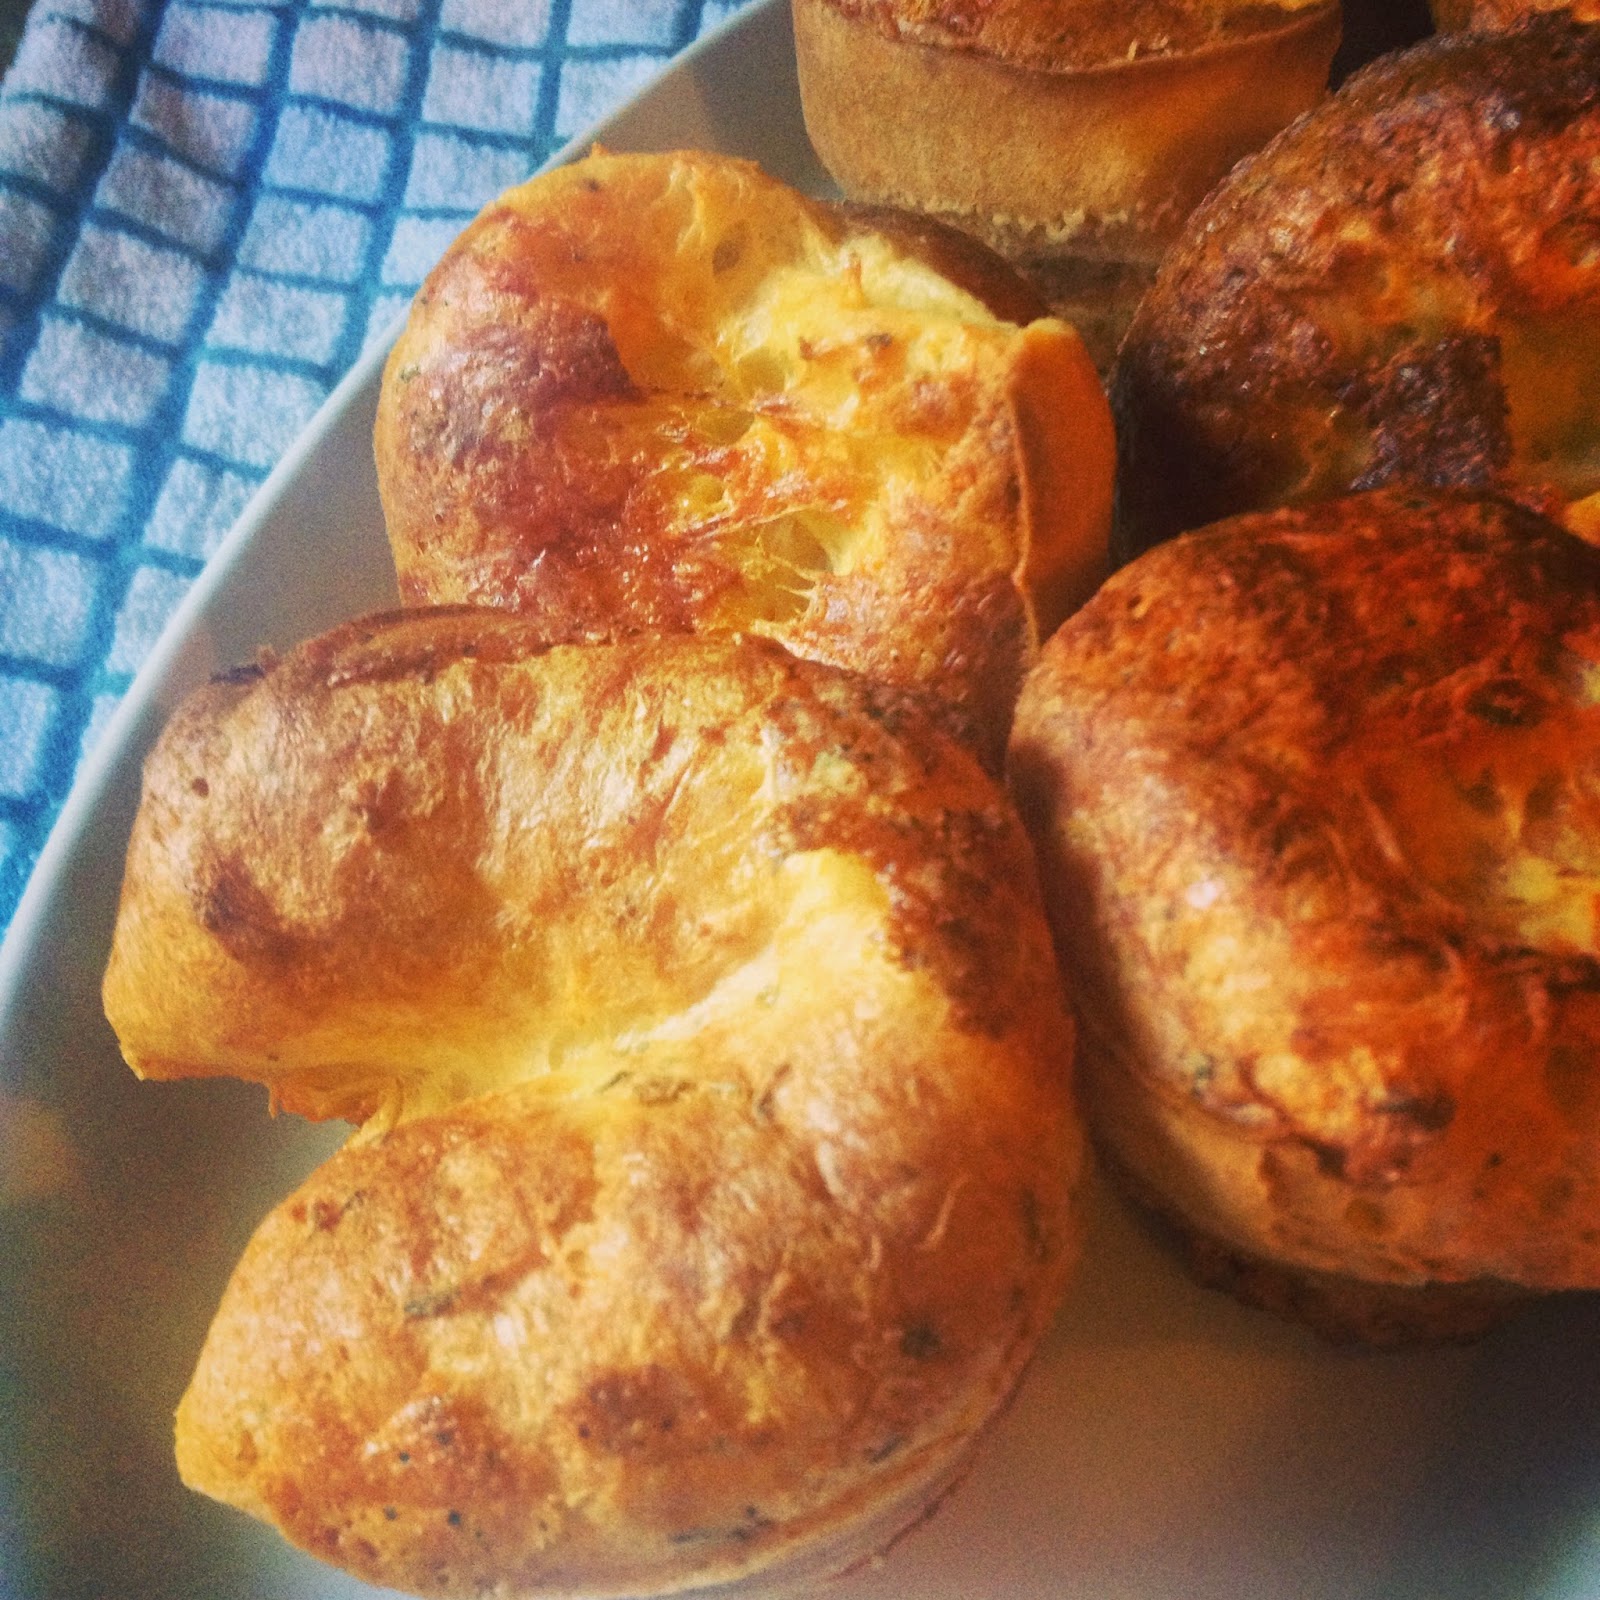
Those popovers popped and they popped beautifully.  I don't know if all my failed attempts in the past were the fault of my oven, my crumby muffin tins, my equally crummy attitude as my number of failed attempts grew or if by some design the popover goddesses just knew they needed to wait for this day.
A day where it was just me and my mom, my grandma and my little sister laughing and having a good time in the kitchen together, and then the popovers popped.
Enjoy.
Popovers
Makes: 20 (in a muffin tin)
Ingredients:
4 ounces butter, melted
6 eggs
2 cups all-purpose flour
2 cup milk
1 cup shredded mozzarella cheese, plus more for sprinkling
1 tsp. salt
1 tbsp garlic powder
1 tbsp ground thyme
1 tbsp. ground oregano
Black pepper
Butter or cooking spray
Flour, for dusting in muffin tins.
Directions:
1.  Preheat oven to 450 degrees F.
2.  Take your muffin tin and using the butter or cooking spray light coat the inside of your muffin tins.  Sprinkle with flour and move tray around to coat the butter/cooking spray with flour (like you would butter and flour a cake pan).  Dump out any excess flour and set aside.
3.  In a large mixing bowl add in your eggs, and beat 1 minutes.  Add in the milk, flour, garlic powder, thyme, oregano, salt and melted butter and combine. Stir in the cheese.
4.  Using a ladle, fill muffin tins 3/4 of the way full with batter.  We filled about 18-20.  Sprinkle each with black pepper and shredded cheese to taste.  Place in the oven and cook for 20 minutes.  Reduce heat to 350 degrees F and continue cooking for another 15 minutes or until the tops are nice and browned.

Wednesday, April 23, 2014

Roasted Eggplant with Tomato, Mozzarella and Basil

This blog has moved to a different site.  To get more great recipes and see new post, go to cookingwithbrittany.com


Tonight was one of those nights were I just felt like going to the store and picking out whatever called out to me, as long as it wasn't mushrooms, zucchini, green beans or asparagus

....As I have had an over abundant amount of these things in the past two weeks and needed a change of pace!

So I got a multitude of different ingredients, from eggplant, tomatoes, mozzarella and basil like the title suggests to leeks, lemons, Brussels sprouts, and tilapia.  And so the ideas began to swarm.

I needed something different, desperately.


I have made eggplant fries before.  They are completey delicious and have resulted in one of my best food memories, though that is best left for a different post (one that has to do with the eggplant fries). 

So this seemed like the complete opposite of that and something different to do with eggplant.  You can look at it as a spin on eggplant pizzas or a spin on caprese salad or you can simply look at it as a deliciously yummy way to serve eggplants.

Enjoy.

Roasted Eggplant with Tomato, Mozzarella and Basil
Serves: 4
Ingredients:
1 large eggplant, sliced lengthwise- 1/2 inch thick
2 Roma tomatoes, thinly sliced
2 cloves garlic, minced
3 sprigs thyme, leaves removed
1/2 cup fresh mozzarella, pearl or torn into smaller pieces
2 tbsp. olive oil
2 tbsp. balsamic vinegar
Kosher salt
Freshly ground black pepper.

Directions:
1.  Place the sliced eggplant, on a parchment-lined baking sheet.  Drizzle with olive oil, and season with salt and black pepper.
2.  Sprinkle with minced garlic and thyme, and layer with sliced Roma tomatoes.  Top with  mozzarella and drizzle with balsamic vinegar.
3.  Bake at 400 degrees F for 20-30 minutes or until eggplant is soft and cheese is golden brown

Sunday, April 13, 2014

Mushroom-Swiss Grilled Cheese


Went on a mushroom kick last weekend.  There's something fun and exciting to me about spending the day in the kitchen with the windows open letting in the much awaited warmer weather.  So that's how I spent my Saturday, while trying out recipes to get through the pounds of mushrooms that I had at home.

I made loads of different things, but this might just be one of my favorites...and I didn't even make it when I was doing all the mushroom cooking.  It was the next day.  I was looking for something quick and easy to do for lunch the day after and still had just a few baby Portobello mushrooms leftover so I figured I would go with that.  Throw in some leftover cheeses, Venison breakfast sausage I had already browned the morning, slices of whole-wheat baguette and you've got yourself the makings of a nice little grilled cheese sandwich.


Did I say butter?  To me the butter on the grilled cheese has always been the forgotten part.  But why?   Can't we find a way to make the butter more than just a means to toast bread and melt cheese, can we make the butter another flavor compontent?  Well of course we can, little bit of minced rosemary and roasted garlic cloves and we have ourselves and Rosemary-Garlic Compound Butter.
Now with that idea, it was time to grill them up.


The Venison breakfast sausage is optional, I did half with and half without when I made these for lunch.  If your going to use it I would suggest using a different bread than a baguette so you have more surface area.  With the baguette slices,  everything gets piled so high, that I had a hard time keeping the sausage on it before I grilled it. 
Of course I missed posting this on National Grilled Cheese Day, which was yesterday (April 12).  However at least I was still ahead of the game on making it a week in advance.  Here's to next time actually being on time and meeting my own deadlines.
Enjoy.

Mushroom-Swiss Grilled Cheese
Makes: 4 sandwiches
Ingredients:
Whole-wheat baguette, cut on the bias into 1/2 inch thick slices
4 slices Swiss cheese, cut in half
1 cup shredded parmesan cheese
1 package baby Portobello mushrooms, thinly sliced
8 oz. Venison breakfast sausage, cooked and crumbled (optional)
1 tbsp. fresh thyme leaves, minced
1 tbsp. olive oil
4 oz. butter, softened
6 cloves roasted garlic
1 sprig rosemary, leaves removed and minced
****Most of the amounts given are a guesstimation, make them with the amounts you prefer.  If your more of a cheese fan and just want a hint of mushroom lower the amount of mushroom you use and vise versa if your more of a mushroom fan.  

Directions:
1.  Start with making your compound butter.   Using a small bowl mix together the softened butter, roasted garlic, minced rosemary and a pinch of salt until fully combined.  (My roasted garlic just blended right in, but you might want to mince it down a little if you want to make it easier to incorporate.)  Set aside until ready to use.
2.  Using a medium sauté pan, heat olive oil over medium-high heat.  Add in mushrooms and sauté until softened, about 10 minutes.  Remove from heat and set aside.
3.  Assemble:  Butter one side of 8 baguette slices, set 4 to the side and using the remaining 4 place buttered side down.  Top these slices with 1/2 slice of Swiss cheese and a sprinkle of parmesan cheese.  Top with sautéed mushrooms, minced thyme, and then the sausage (optional).  Top with the remaining Parmesan cheese and the last of the Swiss cheese.  Top with the 4 remaining bread slices, buttered side up.
4.  Using a large nonstick skillet or griddle, heat over medium heat.  When ready, place your sandwich in pan.  Cook until brown, about 1-2 minutes and then flip carefully to brown the other side.   While cooking, using your spatula apply some pressure on the sandwich squashing it just slightly to make sure the top layer and bottom layer of cheese bond together when melting.  Cooking until brown and cheese is melted, 1-2 minutes then remove from heat.


Tuesday, April 8, 2014

Smoked BBQ Spice Rubbed Pork Shoulder


It’s finally started to warm up, and when I have been able to sit outside and work on the laptop (like I am right now) two days in a row without my winter jacket on then I am officially calling it.  Spring is here!

Of course, now that I’ve said it, we’ll end up with a blizzard or something next week just to make me eat my words.  But if all goes well, it should hopefully remain like it is and slowly get warmer (bring on the heat and humidity!)

However, when I think spring and the beginning of warm weather, I start to get really excited about grilling.  And since this is the first spring arrival I am experiencing after getting my very own smoker I am starting to get giddy about that too.

 
I grew up with my summer weekends being filled with cookouts with my family and enjoying my time outside.  And one of the more special things that my father would do is pull out his smoker and spend a whole day smoking various meats while working in the garden with my mom.  We’re lucky enough to have a big cherry tree in my parents’ back yard, so whenever my dad was trimming branches he would always save them and trim the branches into smaller sizes and then soak those in water before beginning the smoking process. 

Smoking meat is a low and slow kind of thing, and you need to be around to tend to it by adding in more wood chips or charcoal throughout the process, so because of this he wouldn’t usually pull out the smoker as often as the grill.  But when he did, he would go all out.  Pork butts, chicken, turkey, ribs, and fish would all go on the smoker at some point in the day (depending on the amount of time needed).  Then we would usually have one of those items for dinner (usually the ribs) and he would freeze the rest, that way he would still get to enjoy that deep smoky flavor in-between “smoke days” without all the work.

 
On my very first solo smoke day (after finally getting a smoker for Christmas and then bags of wood chips, charcoal and lighter fluid for my birthday, from my dad naturally) I decided to stick with pork.  There is just something about pork and smoking and/or barbequing that just goes together so well.  I had already been working on different spice rubs, and I wanted to do one that had the flavor of a barbeque sauce, just without the sauce.  This was inspired by the fact that my dad always smoked a pork butt/shoulder and would then use it the next day as barbeque pulled pork by cooking in the in the crock pot with his favorite barbeque sauce.  So I wanted those flavors, but in a pork loin and not pulled. 

And I got it!  After numerous tries with the rub, I finally got the right balance of sweet and spicy and then the smoky flavor from smoking the pork all day.  It was delicious cut in slices by itself.  It was great the next day sliced for cold sandwiches.  When I say my kind of barbeque this is it and I just can’t wait to get back to my smoker this year…it has been missed.

Enjoy!
 
Barbeque Spice Rub
Makes: approx. 1 1/2 cup
Ingredients:
2 tbsp. salt
4 tbsp. granulated sugar
4 tbsp. brown sugar
1 tbsp. garlic powder
1 tbsp. onion powder
1 tbsp. paprika
1 1/2 tbsp. chili powder
1 tbsp. ancho chili powder
1 tbsp. ground black pepper
1 tbsp. cayenne pepper
1 tbsp. ground thyme
1/2 tbsp. rosemary
1 tbsp. ground cumin
1/2 tbsp. nutmeg
1/4 tbsp. allspice

Directions:
1.  Mix all of the ingredients together in a bowl.